
Have you ever just had a mad craving for something and days or weeks would go by and you still can’t shake the thought of it? Well this was my situation and I decided to cave into my yearning for this Guyanese favorite and make some for myself. The object of my desire was a crispy fried treat affectionately known as “chickenfoot”. Now I grew up rather familiar with this name and as quirky as it is, it never seemed that strange in Guyana during my childhood. However as I reflect on the curious nature of the name, I feel the need to change it into something which gives a better and more palatable description of this snack. Perhaps the name was coined due to the skinny slightly yellow appearance, much like chicken feet. However, there is definitely no chicken nor are they chicken feet in this recipe.
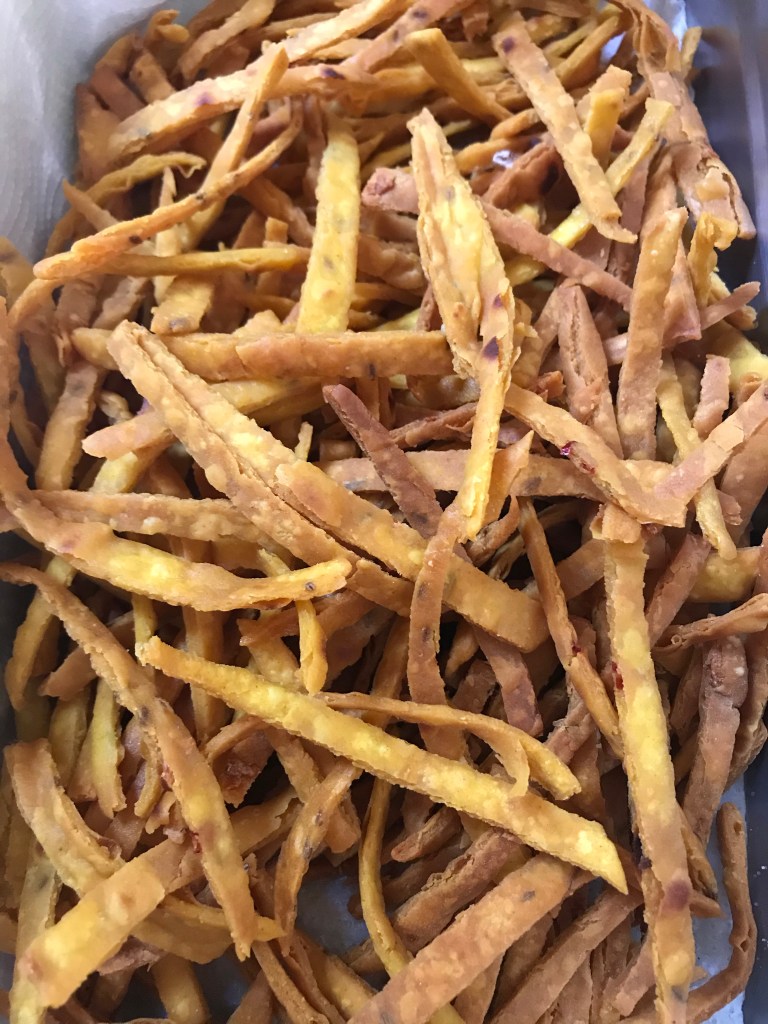
Chickenfoot is a tasty, crispy fried dough seasoned with Indian spices. Traditionally it is made with flour and split pea flour, but I decided to make it with chickpea flour or besan and I really like the results. I use besan for so many things that I knew it would be a favorable addition to this recipe. I seasoned the flour with fresh crushed garlic and fresh thai chili peppers as I wanted some spice and a kick. I also added toasted geerah seeds instead of ground cumin as I really enjoy the tasty nutty flavor of the whole spice. Traditionally some curry powder and some yellow food coloring is added, but I preferred to use turmeric as it is a spice which I love both for its taste and for its nutritional value and I try to incorporate it in as many dishes and seasonings as I can. Turmeric gives a nice color to the dough and there is absolutely no need to add artificial coloring to the mix.

First off, there are actually several steps to creating this snack which I actually never realized. It was not difficult to make, but it does take a bit of time which is well worth it in the end. The dough can be made in the mixer, but I kneaded it by hand. It is a sticky dough, so be prepared to work a bit to get the dry ingredients and spices all incorporated with the water to form a smooth pliable dough. If you prefer to opt out of this hand method, feel free to use your mixer and dough hook.

The step of rolling the dough ball into a “roti like disc” and then partially cooking it on the tawa is an important step. As I do not have a little extruder called a press sev sancho which allows you to press the dough strands directly into the oil for frying;I had to opt for this step.

By cooking the dough lightly, you can easily cut the thin strand and fry them. If you skip this step, you will have GREAT difficulty lifting the cut pieces of uncooked dough. Therefore, do not eliminate this step unless you like unnecessary traumatic and frustrating experiences or you have a press sev sancho in your cupboard.

I used a pair of kitchen scissors to cut my cooked dough as I found this far easier than using a pizza cutter. Theoretically it seemed easier to use the roller, but I found that I could cut them faster and easier with the kitchen shears. They do not have to be perfectly sliced or equal lengths, but they need to be consistent in the thickness. Try to cut them quite thin and not vary the width too much or this will cause you some problems frying as some will brown faster than others. They also cook quite quickly, so be attentive and have your equipment ready. I suggest that you cut all pieces before starting the frying step as they fry and brown quite quickly.


Believe it or not, the reason why I really wanted to make these nibbles is because I had made some super delicious tamarind sauce and wanted to relive my memories of eating chicken foot doused with tamarind sauce on brown paper like I did as a child. It was magical and so worth it, though I did not eat it off of brown paper like the sidewalk vendors or tuckshop ladies would prepare it. Chickenfoot is also perfect with mango sour as some of you may already know. We Guyanese like to dip our fried foods into some sweet and savory sauce, so we make achars, sweet and sour dips and chutneys to satisfy this passion.

I hope you try this recipe sometime. It’s tasty and will be loved by young and old. If you are Guyanese and live somewhere else in the world, you may enjoy taking a trip down memory lane like I did when making these little beauties.

Savory chickpea nibbles or chickenfoot
Ingredients
1 cup all purpose flour
¾ cup chickpea flour (besan)
½ tsp salt
2 cloves garlic finely minced
½ tsp cumin seeds
½ tsp turmeric
1-2 hot peppers, finely chopped ( optional or vary to your taste)
½ cup water
Method
In a mixing bowl, place all dry ingredients and mix together to incorporate evenly.
Add the minced garlic and finely chopped hot pepper if using. Combine well.
Add the water and mix to make a slightly sticky but firm dough. The dough should pull away from the sides of the bowl and come together in the dough bowl. If a little more water is needed, add a few tsps to incorporate completely.
Divide the dough ball into 4 portions and roll into balls.
Flour a flat surface and roll the dough balls into a thin round the thickness of a roti.
Heat a tawa or round skillet and cook the flattened dough for about 2-3 minutes per side or until small brown flecks appear.
Fold each warm cooked disc into halves and then quarters. Using a kitchen scissors or pizza slicer, cut the cooked dough into very thin strips.
Heat 2 cups canola or vegetable oil in a deep heavy pot. Fry a few handfuls of the matchstick sliced dough until golden brown. Remove with a slotted spoon draining all excess oil and place on absorbent paper. Continue frying small portions until all the dough has been fried.
Once cool, serve the chicken foot with tamarind, mango or tomato chutney. Also delicious just on its own.
Store in an airtight container for a week if they last that long!
Got ingredients – am so going to try this – thanks Unnie!! 💜
You’re welcome Eonnie!! Let me know how it comes out 💜💗
Unnie,
Pls follow the instructions closely for a successful outcome.
Love
Eonni
Thank you. i will add this to my Covid culinary experiments.